Install Smarter, Age Wine Better
TL/DR & Quick Answer Wine Cellar Cooling Installation
Expert Guide: Wine Storage for Small Apartments and Large Cellars - To install a wine cellar cooling unit successfully, choose the right system based on your cellar's cubic footage, prepare your space with R-19 wall insulation and vapor barriers, and follow manufacturer installation guidelines for electrical, drainage, and ventilation requirements. Wine Cellar HQ offers complete cooling systems from through-the-wall units starting at $1,800 to fully ducted systems for luxury installations. Professional installation ensures optimal 55°F temperature maintenance and protects your wine investment long-term.

Key Insights: Wine Cellar Cooling Success
- Size Matters: Calculate cellar volume (Length × Width × Height) and match to BTU capacity - undersized units struggle while oversized units waste energy and cause temperature swings
- Insulation is Critical: R-19 insulation for walls, R-30 for ceilings, plus vapor barriers, prevent 90% of cooling system failures related to poor thermal envelope
- Professional-Grade Systems: WhisperKOOL and Wine Guardian units provide superior longevity and precise humidity control between 55-70%
- Investment Protection: Proper installation prevents wine spoilage that can cost thousands more than the cooling system itself
- Energy Efficiency: Variable-speed compressor technology reduces operating costs by up to 40% compared to standard units
Table of Contents
Do I Really Need a Cooling Unit for My Wine Cellar?
Quick Answer: Yes, you definitely need a cooling unit for your wine cellar, especially if you live in a region with fluctuating temperatures or high humidity. Wine requires stable conditions between 50-60°F with 55-70% humidity to age gracefully and retain flavor profiles. Without proper cooling, temperature swings above 70°F accelerate aging and can spoil wines within months rather than allowing proper aging over years.
How Do I Choose the Right Wine Cellar Cooling System?
Complete Guide: Wine Cellar Cooling Unit Selection - Selecting the best wine cellar cooling unit depends on your cellar's size, location, noise tolerance, and installation complexity preferences:
| System Type | Best For | Pros | Installation | Brands |
|---|---|---|---|---|
| Through-the-Wall | Small cellars (≤500 cu ft) | DIY-friendly, cost-effective | Easy, no ductwork needed | CellarCool CX, WhisperKOOL SC PRO |
| Ductless Split | Mid-size, noise-sensitive spaces | Quiet operation, remote condenser | Moderate to Hard | WhisperKOOL Platinum Split |
| Fully Ducted | Large, luxury cellars | Nearly silent, even air distribution | Hard, professional recommended | Wine Guardian DP Series |
| Ducted Self-Contained | Versatile mid-size builds | Balanced airflow, no refrigerant lines | Moderate difficulty | WhisperKOOL Quantum SC |
How Do I Prepare My Wine Cellar Before Installation?
Expert Guide: Wine Cellar Preparation - Proper preparation of your wine cellar ensures your cooling unit works efficiently and prevents costly failures. Focus on insulation, vapor barriers, electrical requirements, and space planning with these beginner-friendly steps.
What Tools and Materials Do I Need for Installation?
Always refer to your specific cooling unit's installation manual for exact material specifications, as requirements vary between manufacturers and models. When in doubt, consult with local HVAC professionals for guidance.

Cutting & Measuring Tools
- Reciprocating Saw (Sawzall): Milwaukee 6519-31 or DeWalt DWE305 for cutting wall openings
- Jigsaw: Bosch JS470E for precise cuts in drywall and wood
- Measuring Tape: Stanley 25-foot FatMax for accurate measurements
- Level: 24-inch Craftsman bubble level to ensure the unit sits straight
- Stud Finder: Zircon StudSensor e50 to locate wall studs
- Utility Knife: Stanley 10-099 retractable blade for cutting insulation
Drilling & Fastening Tools
- Drill/Driver: DeWalt 20V MAX cordless drill with bits
- Hole Saw Kit: Milwaukee 49-22-4025 for clean circular cuts
- Screwdriver Set: Klein Tools 11-in-1 screwdriver
- Socket Wrench Set: Craftsman 230-piece for various bolts
Safety Equipment
- Safety Glasses: 3M SecureFit protective eyewear
- Work Gloves: Mechanix Wear Original gloves
- Dust Mask: 3M 8210 N95 respirator for cutting dust
- Knee Pads: NoCry Professional knee pads for floor work
How Do I Measure My Cellar for the Right Cooling Unit?
First, calculate your cellar's size in cubic feet to choose the right BTU capacity:
- Formula: Length × Width × Height = Cubic Feet
- Example: A 10×10×8 ft room = 800 cu ft. Most units list a capacity range (e.g., 800–1000 cu ft), so match this to your measurement.
- Why It Matters: An undersized unit struggles to cool, while an oversized one wastes energy and creates temperature fluctuations
How Do I Confirm My Room Is Properly Sealed?
A sealed cellar maintains stable temperature and humidity. Focus on these three critical areas:
Insulation Requirements
- What to Use: Install R-19 insulation for walls and R-30 for ceilings. Insulate the floor with R-10 rigid foam for extra stability.
- How to Install: Ensure all surfaces are completely covered, as gaps allow heat and moisture infiltration. Avoid fiberglass batts as they compress over time. Use rigid foam boards or spray foam instead.
- Why Critical: Proper insulation keeps cold in and heat out, reducing strain on your cooling unit by up to 50%
Vapor Barrier Installation
- What to Use: Place a 6mm polyethylene sheet on the "warm" side of insulation (facing outside the cellar) to prevent moisture penetration
- Installation Method: Overlap sheets by 6 inches and seal with vapor-barrier tape. Extend over the floor and up the walls for complete coverage
- Critical Function: Blocks moisture from entering, preventing mold and wood rot that destroys wine storage environments
Airtight Door Systems
- Requirements: Install an exterior-grade door with weather stripping to prevent air leaks
- Testing Method: Close the door and check for light leaks - seal any gaps with additional weather stripping
- Performance Impact: An airtight door prevents air leaks that disrupt temperature and humidity control systems
Where Should I Place My Wine Cellar Cooling Unit?
- Optimal Location: Mount on a wall venting into a larger, well-ventilated adjacent room - never a small closet or cramped space
- Clearance Requirements: Ensure the exhaust side has 3–5 feet of clear space for through-the-wall units. Confirm duct paths or condenser placement won't be blocked for split/ducted systems
- Performance Impact: Poor placement traps heat, overworks the unit, and shortens lifespan by up to 70%
Ventilation and Airflow Requirements
- Clearance Standards: Maintain 3–5 feet unobstructed exhaust space for through-the-wall units. Split systems need clear duct paths, with condensers requiring open air circulation
- Airflow Testing: Before mounting, test the location by running a fan in the adjacent room to ensure proper air circulation
- Avoid Blockages: Don't place furniture or storage near exhaust/intake - restricted airflow cuts efficiency by up to 30%
- Critical Importance: Good ventilation prevents overheating, reduces energy consumption, and extends equipment life
What Are the Electrical Requirements for Wine Cellar Cooling Units?
Every wine cooling unit has specific power demands. Undersupplying voltage can damage expensive equipment and compromise your entire wine collection.
"Over 90% of all HVAC breakdowns are related to electrical issues." - Advanced Energy
| Unit Type | Voltage | Dedicated Circuit | Amperage |
|---|---|---|---|
| Through-the-Wall | 110–120V | Yes | 3–6 amps |
| Ductless Split Systems | 230V | Yes | 8–15 amps |
| Ducted Systems | 110V/230V | Yes | 4–15 amps |
How Do I Handle Drainage and Condensate Management?
Wine cellar cooling units generate significant condensation as they remove excess moisture from the air. Without proper drainage planning, water can overflow drain pans, damage wine racks, and create mold conditions that destroy collections. Prevent problems by:
- Installing a condensate drain with a minimum 1/4 inch per foot slope to prevent water buildup and mold
- Using gravity drain or pump backup for ducted units, depending on installation height and drainage accessibility
How to Install a Wine Cellar Cooling Unit: Step-by-Step Guide
Installing a wine cellar cooling unit properly is crucial for maintaining optimal temperature and humidity. While professional consultation is recommended for high-end or large installations, here's a comprehensive step-by-step guide for installing different cooling system types.
How Do I Install a Through-the-Wall Cooling Unit?
- Choose Location: Select a cool interior wall away from heat sources and direct sunlight
- Cut Opening: Create a hole sized to unit dimensions (typically 24" wide × 18" high - verify with your unit's specifications)
- Build Frame: Frame opening with wood studs for support and stability
- Install Unit: Slide cooling unit into framed opening or metal sleeve (requires two people). Position flush with the cellar wall as recommended
- Seal & Insulate: Apply caulking around edges and use weather stripping to ensure an airtight seal, maintaining vapor barrier integrity
- Connect Drain Line: Attach the condensate drain line to a safe discharge point for moisture removal
- Power Connection: Plug into a dedicated electrical outlet (110V or 220V per manufacturer specifications)
- System Testing: Run unit 24–48 hours before adding wine to ensure desired temperature and humidity maintenance

- Double-check wall thickness - standard units fit 2×4 walls, but 2×6 walls may need an extension kit
- Ensure 3–5 inches of clearance around vents for proper airflow
How Do I Install a Ductless Split System?
- Place Condenser: To install a ductless split system, find a suitable outdoor or mechanical room location for the condenser unit
- Mount Evaporator: Inside the cellar, mount the evaporator unit on the wall or the ceiling
- Run Lines: Connect refrigerant lines and electrical wiring between evaporator and condenser (lines can extend up to 75 feet)
- Install Drain Line: Attach the drain line for condensate removal inside the cellar
- Power Supply: Ensure dedicated power for both units
- Seal Openings: Seal wall openings where lines pass through
- Test System: Monitor temperature and humidity controls for 24-48 hours before loading wine bottles

- Place the outdoor condenser in a shaded area to improve efficiency by up to 15%
- Ductless split systems require an EPA-certified refrigeration technician for refrigerant line connections and soldering
Watch this installation video from WhisperKOOL for visual guidance:
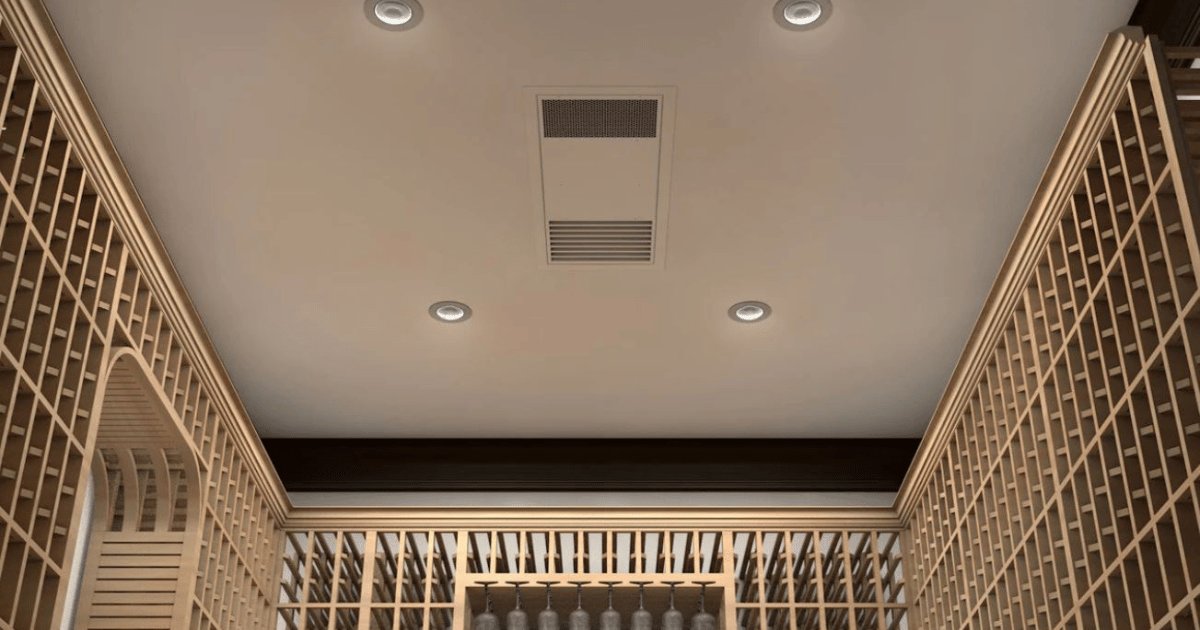
How Do I Install a Fully Ducted System?
- Locate Unit: Choose a mechanical room or space outside the cellar for cooling unit placement
- Plan Ductwork: Design duct runs for cold air supply and warm air return (ducts typically up to 25 feet)
- Install Ducts: Connect insulated ducts from the cooling unit to cellar's supply and return vents, ensuring all connections are sealed to prevent leaks
- Mount Vents: Install vents inside cellar walls or ceiling for even air distribution
- Connect Drain Line: Attach the condensate drain line to the unit
- Seal & Insulate: Ensure all ductwork is sealed and insulated to prevent energy loss
- Test System: Monitor temperature and humidity controls for 24-48 hours before storing your wine collection

- Use insulated flex ducts for easier installation in tight spaces
- Consider hiring an HVAC professional for ductwork design and installation due to system complexity
How Do I Install a Ducted Self-Contained System?
- Place Unit: Install self-contained unit in mechanical room or outside cellar
- Install Ducts: Connect insulated ducts for cold air supply and warm air return to the cellar
- Mount Vents: Attach supply and return vents inside the cellar
- Connect Drain Line: Attach the condensate drain line to the unit
- Power Connection: Connect to a dedicated electrical outlet
- Seal & Insulate: Ensure all ductwork and openings are sealed and insulated
- System Testing: Run the system for 24-48 hours and adjust settings for temperature and humidity before placing wines inside

What Are the Best Wine Cellar Cooling Units by Cellar Size?
Key Insight: Wine Cellar Cooling System Selection - Matching cooling capacity to cellar volume is critical for maintaining optimal 55°F storage temperature and 60-70% humidity levels.
| Cellar Volume | Top Picks |
|---|---|
| Under 500 cu ft | WhisperKOOL SC PRO 2000, CellarCool CX2200 |
| 500–1500 cu ft | WhisperKOOL Slimline LS, WhisperKOOL Quantum SC |
| 1500–2000+ cu ft | Wine Guardian DP Series, WhisperKOOL Platinum Split 8000 |
WhisperKOOL SC PRO 2000

CellarCool CX2200

WhisperKOOL Slimline LS

Explore more products. Shop our cooling units!
How Do I Maintain and Troubleshoot My Wine Cellar Cooling Unit?
To ensure your wine cooling system performs optimally, implement these maintenance and troubleshooting strategies.
Essential Maintenance Schedule
- Clean filters every 3 months with warm, soapy water to maintain optimal airflow
- Inspect drainage quarterly - pour a cup of water into the drain to check for slow flow or blockages
- Clean coils with a soft brush to avoid bending fins and maintain heat transfer efficiency
Common Troubleshooting Solutions
- Noise Issues: Check for loose parts or improper leveling. Tighten screws or adjust shims to eliminate vibrations.
- Temperature Swings: Verify insulation and seal integrity to prevent drafts. Reseal gaps as needed with weather stripping.
- Compressor Hums but Doesn't Cool: Could indicate a capacitor issue, refrigerant leak, or other problems. Call an HVAC-certified technician for a proper diagnosis.
What Are the Most Common Installation Mistakes and How Do I Avoid Them?
Installing a wine cellar cooling unit requires precision and attention to detail. Here are the most critical mistakes beginners make, along with practical solutions to ensure installation success.
| Mistake | Problem | Solution |
|---|---|---|
| Poor Sealing Around Unit | Air leaks cause temperature fluctuations and overwork | • Seal gaps with Great Stuff Pro foam • Apply 1/2-inch foam tape weather-stripping • Install with 1/4-inch downward tilt • Test for leaks with a smoke pencil |
| Inadequate Vapor Barrier | Moisture penetrates insulation, reducing efficiency | • Install 6-mil plastic on the warm side • Seal seams with aluminum foil tape • Extend barrier 6" beyond the opening • Use Tyvek tape for penetrations |
| Poor Drainage Planning | Condensate overflow leads to water damage | • Install secondary overflow pan • Use 3/4-inch tubing with proper slope • Install condensate pump if needed • Test drainage with 2 gallons of water |
| Blocked Airflow | Restricted airflow causes overheating | • Maintain 24-inch clearance around units • Vent into a well-ventilated space • Add louvered vents if needed • Use vibration pads |
| Undersizing Unit | Can't maintain temperature, risking spoilage | • Calculate cellar volume (L×W×H) • Add 25% buffer for losses • Use manufacturer BTU charts • Consider heat loads |
| Skipping Test Period | Loading wine immediately hides problems | • Run unit 48 hours before adding wine • Monitor with a separate thermometer • Check for leaks daily • Verify humidity 55–70% |
What Are the Most Energy-Efficient Wine Cellar Cooling Options?
Energy-efficient wine cellar cooling units save costs and reduce environmental impact, making them worth the investment. Look for these advanced features:
- Inverter Technology: A System that adjusts compressor speed to match cooling demand, improving energy efficiency by up to 40%
- Smart Controls: App-enabled units allowing remote temperature monitoring, scheduling energy-saving modes during off-peak hours, and maintenance alerts
- Variable Speed Compressors: Modern units employ variable-speed technology to minimize energy consumption while maintaining optimal performance
- Energy-Saver Mode: Programmable energy-saving modes that automatically adjust operation during low-demand periods
- Quick-Chill Mode: Efficient rapid cooling that minimizes energy waste during initial temperature setup
Browse our energy-efficient wine cellar cooling units.

What Are the Ideal Conditions for Wine Storage?
Key Insight: Perfect Wine Storage Environment - The ideal temperature for cooling wine varies depending on whether it's for storage or serving. Here's the definitive guide:
- Storage Temperature: Ideally 55°F (13°C), with an acceptable range of 50–60°F. Red wines can tolerate the higher end of this spectrum
- Serving Temperature: Depends on wine type—reds typically 55–65°F, whites 45–50°F for optimal flavor profiles
- Humidity Control: Maintain between 55–70% to prevent cork shrinkage and preserve wine labels
Check out our Wine Storage Temperature Chart to preserve your wine collection optimally.
Conclusion
Expert Guide: Wine Cellar Success - Mastering wine cellar cooling installation requires understanding insulation, electrical systems, and effective drainage management. Proper installation ensures optimal 55°F temperature for wine preservation and equipment longevity extending beyond 15 years. Wine cellars protect investment-grade collections while adding significant property value.
Do you still need help?
Schedule a free consultation with our Wine Cellar HQ experts at 888-589-1833 to find the right system for your cellar.
Ready to safeguard your wines? Start browsing our cooling unit collection.
Additional Resources
- Wine Guardian Collection
- WhisperKOOL Systems
- How to Find the Right Cooling Unit for Your Wine Cellar
- How to Build a Wine Cellar