The beauty of creating your own wine storage lies in its flexibility. The good news is you can build a DIY wall wine rack tailored to your needs and taste with basic materials and patience.
Ready to build a stunning and functional wine wall? Follow our beginner-friendly guide as we walk you through the steps to create a wine display you can be proud of.
Why Build a Wall Wine Rack?

-
Space-Saving Design: Perfect for smaller areas like kitchens or dining rooms.
-
Customizable: Create a design that aligns perfectly with your home décor and meets your storage requirements.
-
Cost-Effective: Building one often costs less than purchasing a pre-made option from stores like Home Depot.
-
Practical and Decorative: Organize your wine bottles while enhancing your décor.
Tools and Materials Needed
The right tools and materials are crucial for building a sturdy and stylish DIY wall wine rack. This section includes the essentials and optional items for a smooth and secure build.
Essential Materials
-
Types of Wood: Choose hardwoods like oak or maple for durability and their attractive wood grain. Pine or plywood can be a great option if you're on a budget.
-
Wood Glue: Ensures your joints hold tightly for long-lasting wine storage.
-
Wood Screws: Ideal for securing pieces of wood together.
-
Pocket Hole Screws: These work perfectly for hidden joints, especially when assembling the rack's frame.
-
Wall Anchors: Essential for safely mounting your wine rack on the wall, especially if you’re not drilling into studs.
-
Wine Bracket: Holds wine bottles in place, ensuring they are stored securely.
Tools Required
-
Circular Saw: Cuts your wood to the correct size.
-
Nail Gun: Speeds up securing cross rails or trim pieces.
-
Drill: For creating pilot holes and driving screws.
-
Hole Saw: Handy for cutting out rounded spaces for wine bottles if desired.
-
Measuring Tape: Ensures precision in all cuts and placements.
-
Sandpaper: Smooths out rough edges to achieve a professional finish.
-
Clean Cloth: Wipes down dust and debris before staining or painting.
Optional Items
-
Stain or Paint: Customize your wine rack to match your home interior.
-
Scrap Pieces of wood: Great for testing cuts or reinforcing joints.
Pre-Construction: Planning Your Design
Before grabbing your tools, plan the design of your wine rack. Here's how to get started.
Choosing the Right Wall
The first step is selecting the ideal rack location. Consider these options:
-
Dining Room: A convenient spot to display your bottles of wine and create a sophisticated ambiance during meals.
-
Kitchen Wall: Install under upper kitchen cabinets for easy access and space savings.
-
Wine Cellar: Ideal for those with a dedicated collection space.
-
Home Bar: Perfect for creating a statement piece to complement your setup.
Determining Dimensions and Capacity
Think about how many bottles you want the rack to hold. Will it accommodate your entire collection or just a selection of your favorites? Here are some guidelines:
-
Compact Design: Ideal for storing 6–10 bottles, fantastic for small spaces like under new cabinets or in smaller kitchens.
-
Larger Racks: Store up to 20–30 bottles for bigger collections. Make sure your wall space can support this scale.
Factor in the size of standard wine bottles and adjust your dimensions to match. Using a flat surface during construction ensures precise measurements.
Horizontal vs. Vertical Orientation

-
Vertical Designs: These save horizontal space and work well in smaller areas like kitchens. It's also ideal for bottles with screw tops.
-
Horizontal Layouts are better for displaying more bottles, making them a great choice for a wine connoisseur with a bigger collection.
Aesthetic Integration
The wine rack should blend seamlessly with your room. Consider these aspects:
-
Wood Grain and Finish: Dark stains for rustic settings or natural finishes for a modern touch.
-
Room Compatibility: Choose a style that enhances your dining room, kitchen, or home bar without overpowering the space.
-
Trending Ideas: Check TikTok – make or Pinterest for inspiration and modern wine rack ideas that fit your vibe.
Construction Guide
Follow the step-by-step instructions we outlined below.
Preparation
Before starting your DIY guide, gather all materials and clear your workspace, ideally on a sturdy table or kitchen counters. Here's how to begin:
Material Preparation
-
Cut your plywood pieces according to your planned dimensions. For a standard 6-bottle rack, you'll need:
-
Two side pieces (24" x 12")
-
Three horizontal piece segments (18" x 4")
-
Six shelf pieces for bottle supports (6" x 4")
Surface Treatment
-
Sand all edges of your piece of wood with 120-grit sandpaper
-
Wipe with a clean cloth to remove dust
-
Pre-finish the wood before assembly for better results
Layout Planning
-
Mark locations for your bottle holders
-
Space them evenly for a professional look
-
Consider your dining room dimensions for optimal placement
Assembly Process
1. Building the Frame
Start with the basic structure of your wall-mounted racks:
-
Align your end panels perfectly
-
Use a carpenter's square to ensure 90-degree angles
-
Apply wood glue to joints before screwing
2. Adding Support Structure
For your wine bottle holder:
-
Install the first horizontal support 6" from the top
-
Space additional supports 8" apart
-
Secure each piece with wood glue and screws
-
Let the glue dry completely before moving forward
3. Installing Bottle Supports
Create spaces for your favorite bottles:
-
Attach the bottle cradles to your base cabinet frame
-
Ensure each wine bracket is level
-
Install vertical dividers between bottle spaces for added stability
-
Test fit with an empty bottle before securing it permanently
4. Final Assembly
Complete your own wine rack by:
-
Securing all joints
-
Double-checking all connections
-
Installing any decorative trim
-
Adding the back of the rack panel if desired
5. Pre-Installation Check
Before mounting your wood plank wine rack:
-
Verify all joints are secure
-
Test weight capacity
-
Check for level surfaces
-
Ensure proper spacing for upper cabinets
Mounting Your Wine Rack
1. Finding Proper Support
-
Use a stud finder to locate wall studs
-
Mark stud locations clearly
-
Plan mounting points for optimal support
2. Installation Process
-
Pre-drill mounting holes
-
Use appropriate wall anchors for your wall type
-
Consider using a mounting bracket for additional support
-
Install the rack at the proper height
3. Weight Distribution
-
Maximum weight capacity depends on:
-
Number of mounting points
-
Wall material
-
Type of anchors used
-
Add support points for heavier loads
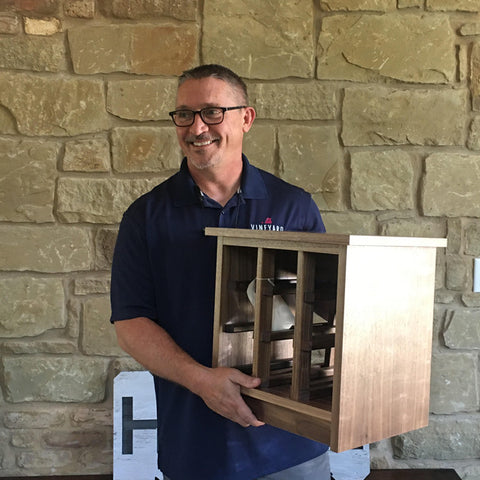
Here’s a DIY wine rack tutorial from John Dolechek:
Maintenance and Care
Keep your next project looking its best and performing well with regular maintenance:
-
Cleaning Techniques
-
Wipe the rack with a soft, damp, clean cloth to remove dust. Avoid harsh chemicals that can damage the finish.
-
Wood Preservation
-
Reapply stain or sealant periodically to maintain the wood's appearance and durability.
-
Protecting Wine Bottles
-
Ensure no sharp edges remain after sanding. Use felt pads or similar materials for added protection.
-
Keep your wine rack in a cool, dry area away from direct sunlight. This will preserve both the wood and your wine collection.
-
Store Some Materials
-
Keep scrap woods from your project for future repairs and touch-ups.
Styling and Usage Tips
A beautiful DIY wine rack is a great way to display your sense of style and appreciation for good wine. You can create a valuable and eye-catching centerpiece with thoughtful styling and organization.
Displaying Your Favorite Bottles
A simple DIY wine rack will help you arrange your collection in a way that highlights your most prized bottles. Consider:
-
Organizing by Type: Group red, white, and sparkling wines for easy selection.
-
By Vintage or Region: If you're a collector, curate wines by vintage year or region.
-
Highlight Favorites: For convenience and aesthetics, place your go-to bottles in the most visible section of the rack.
You can add a space to store your wine glasses on the bottom shelf or adjacent bar cart to create a complete, ready-to-use wine station.
Enhancing Storage Conditions
Proper storage conditions ensure your collection remains in top shape.
-
Room Temperature and Humidity: Position your rack away from direct sunlight and heat sources. Cooler, consistent temperatures and moderate humidity levels help protect your wines.
-
Wall Anchors for Stability: Use sturdy wall anchors to safely support your bottles for wall-mounted designs.
Decorative Elements and Integration
Bring out the best in your wine rack ideas with carefully chosen decorative elements and thoughtful placement.
-
Aesthetic Integration: Match the wood finish of your rack to other furniture, like chest of drawers or true black cabinets, for a cohesive look.
-
Decorative Accessories: Add small accents like greenery, candles, or wine cork displays to complement the rack.
-
Match with your furniture: Paint or stain your base cabinet to match your wine rack. The cabinet can then serve as a stylish base that complements the rack's design, creating a cohesive and attractive display.
-
Positioning for Impact: Place your rack in a high-traffic area, like the dining room or kitchen, where it can be a conversation piece.
Bonus Section: Wine Storage Tips
Proper storage conditions are crucial for preserving the flavor and quality of each bottle of wine. Follow these tips:
Ideal Storage Temperatures
-
Red Wines: Store between 55°F to 65°F for optimal flavor development.
-
White Wines and Sparkling Wines: These do best at cooler temperatures, around 45°F to 50°F.
-
Consistent Climate: Fluctuations in temperature can harm the wine, so a steady environment is key. If you need precise control, consider investing in one of the best wine coolers or dedicated wine fridges.
Horizontal vs. Vertical Bottle Storage
Horizontal storage is generally the preferred storage solution for long-term preservation.
-
Horizontal Storage: Keeps the cork moist, preventing it from drying and letting air in, which could spoil the wine.
-
Vertical Storage: Ideal for wines with screw caps or for short-term use. However, ensure the bottles are stored securely to avoid tipping.
Protecting Wine from Light and Vibration
-
Light Exposure: Prolonged exposure to sunlight or harsh artificial lighting can alter the taste of your wine. Place racks or wine fridges in dimly lit areas.
-
Vibrations: Avoid areas with frequent movement, like near a vibrating washing machine or fridge. Vibration can disturb sediment in the wine and affect its aging process.
Pro Tip: Follow the Manufacturer's Instructions
If you’re using wine coolers or fridges, always check the manufacturer’s instructions and full disclosure policy for proper use and maintenance. Cleaning filters, setting the right humidity, and securing the front edge of racks all contribute to a reliable storage setup.
Common Mistakes to Avoid
Even with the best intentions, a few missteps during your DIY project can impact the functionality and durability of your wine rack. Avoid:
1. Incorrect Measurements
Accurate measurements are critical for creating a stable and well-fitted rack.
-
Key Issue: Miscalculating the size of slots or spacing can make it challenging to hold wine bottles securely.
-
Solution: Double-check all measurements and use a reliable measuring tape. To prevent material waste, measure twice and cut once. Also, consider the bottle sizes.
2. Weak Mounting
A poorly mounted rack can be a safety hazard and may not be able to support the weight of your bottles over time.
-
Key Issue: Failing to locate wall studs or using inadequate wall anchors can cause the rack to pull away from the wall.
-
Solution: Always mount your rack into studs or use heavy-duty wall anchors. Ensure the weight is evenly distributed across the rack.
3. Improper Wood Selection
Choosing the wrong type of wood can compromise the strength and aesthetics of your rack.
-
Key Issue: Softwoods like pine may not support heavier bottles and can warp over time.
-
Solution: Opt for durable hardwoods like oak, walnut, or maple.
4. Neglecting Finish and Protection
A wine rack without proper finishing can degrade quickly, especially in humid environments like kitchens or cellars.
-
Key Issue: Skipping steps like sanding, sealing, or staining can leave your rack vulnerable to damage and wear.
-
Solution: Sand all surfaces thoroughly, apply a protective sealant and consider staining or painting for added protection and style.
High-Quality Wine Racks
Looking for a wall-mounted wine rack that could be the perfect gift for the wine lover in your life? Building a wine rack isn't an option? No problem!
Wine Cellar HQ offers a range of professionally crafted products that are easy to assemble, customizable, and stylish. Here's a selection of our top products.
Urban Ironcraft Wall-Mounted Wine Racks

-
Sleek Design: Single-bottle, label-facing storage for an elegant display.
-
Durable Construction: Crafted with high-quality steel for long-lasting use.
-
Space-Saving: Perfect for compact spaces while maintaining style.
VintageView Evolution Wine Wall 75
-
Large Capacity: Holds 30–90 bottles, ideal for growing collections.
-
Modern Aesthetic: Minimalist design with acrylic supports.
-
Customizable Setup: Adjustable heights to fit your space.
Straight Wall Rails Metal Wine Rack
-
Compact Design: Holds up to 12 bottles while maximizing wall space.
-
Modern Appeal: Sleek, minimalist metal rails complement any decor.
-
Simple Installation: Easy mounting with included hardware.
Kessick Wine-as-Art Vertical Leather Panel Wine Rack
-
Unique Design: Vertical leather panels for a stylish, artistic display.
-
Compact and Chic: Perfect for smaller spaces or a standout feature.
-
Premium Materials: Leather and wood blend for a refined finish.
VintageView Feature Wall 8 Wine Rack Kit
-
Massive Capacity: Holds 120–360 bottles, perfect for serious collectors.
-
Sophisticated Look: Modern, open design enhances your wine display.
-
Sturdy Build: Engineered to securely hold large collections.
Vinostor Traditional 340-Bottle Wine Display with Tabletop

-
Ample Storage: Accommodates up to 340 bottles, combining storage and functionality.
-
Integrated Tabletop: Adds a convenient space for serving or displaying accessories.
-
Classic Design: Traditional wooden frame blends beautifully with any interior.
Tasting Display Elite Kit Rack - Individual
-
Showroom Appeal: Designed for a professional, polished look in any wine space.
-
Individual Bottle Display: Highlight special bottles with focused elegance.
-
Durable Construction: Built with premium materials for long-term use.
Conclusion
A wall wine rack offers a practical storage solution while showcasing your favorite bottles or organizing your collection. Ready to make your own rack? Start bringing the cellar of your dreams to life today.