Whether you want to upgrade your home or preserve your favorite bottle of white wine, a wine cellar cooling system is an investment worth making. But building a cooling system yourself may seem daunting, not to mention expensive. Fear not; we’ll give you tips and 12 simple steps to build your DIY wine cellar cooling system.
From choosing the right location to installing the unit, this guide will walk you through every aspect of the process. There is no need to spend extra when you can create your own with some elbow grease and dedication. So grab a glass of your finest wine, and let's get you started on this exciting project!
Introduction to wine cellar cooling systems

Proper wine storage is crucial for conserving the flavor and value of your fine wine. Without constant temperature and environmental control, wines will develop sour tastes, oxidize, and lose the charm.
Thus, a wine cellar cooling system is needed to maintain the ideal conditions, ensuring the longevity of the wines. However, not everyone can afford the luxury of commercial-built units, and that’s where budget wine cellar cooling options come into play. They are basically air conditioners built for wines.
For wine collectors who want to construct their own cooling system, it's essential to understand the basics of wine cellar cooling. It involves selecting an appropriate location, insulation, and, most importantly, temperature regulation.
The ideal temperature range for wine storage lies between 45- and 65 degrees Fahrenheit, with a humidity level of 50-70%.
The idea of constructing a homemade wine cellar cooling system entails the installation of a refrigeration unit, tubing, and vents, among other things, and necessitates attention to detail and patience.
Of course, this may not be feasible for wine enthusiasts on a tight budget. Fortunately, alternative methods don't require technical expertise, such as using a wine mini-fridge or even a simple ice bucket when hosting a party.
Tools and materials needed

You will need a reliable system to maintain the ideal temperature to ensure that the money you invest in your wine collection isn't wasted.
One option is to hire a professional to install a wine cellar temperature control system. Still, for those who prefer a do-it-yourself approach, you must first gather the tools and materials required.
Tools:
- Power drill
- Screwdriver
- Wire cutter
- Pliers
- Measuring tape
- Level
- Saw
Materials:
- Insulated ducting
- Refrigeration unit (mini-split or self-contained)
- Digital thermostat
- Electrical wiring
- PVC pipes
- PVC glue
- Insulation foam
- Aluminum foil tape
- Mounting brackets
- Screws
- Nuts and bolts
- Copper tubing
- Refrigerant
- Vacuum pump
- Manifold gauge set
12 steps to Build Your DIY Wine Cellar Cooling System
1. Determine the location and size of your wine cellar.

Before you start building, decide where to place the wine cellar in your home, and measure the size of your wine room to determine the cooling capacity you need.
An active wine cellar is a room where the temperature has to be maintained. Some have passive wine cellars – where the ambient temperature is used instead of an air conditioner – as in the case of basement cellars, where the environment is more regulated.
A larger cellar will require a more powerful cooling unit. In addition, think about the volume of the space or if you need to install wine racks and a fridge inside your wine cellar.
Another critical factor is the number of bottles you plan on storing in your cellar. The average cooling unit can typically handle around 800 to 1000 bottles. Still, if you have a more extensive collection or plan on expanding, you may want to invest in a bigger unit.
You'll also want to consider the cooling unit you use.
The self-contained system is typically more affordable and easier to install but may be less effective for more enormous cellars.
Split system units offer more powerful cooling capabilities and can be customized to accommodate your needs.
2. Choose a location for the cooling unit.
Decide where to place your cooling unit to cool the entire room efficiently. If it's exposed to warm air or natural light, you'll need a stronger unit to combat the extra heat.
3. Select a cooling unit.
Choose a cooling unit based on the size of your residential wine cellar and the cooling capacity you need. You can choose a pre-made unit or build one using a refrigeration system, a thermostat, and a fan.
Picking a suitable cooling unit for your wine cellar design is a good idea to ensure that your precious vintages are kept at the perfect temperature and humidity levels.
It can be challenging to know where to begin since there are many options in the market. But here are the critical factors you need to remember:
- Consider the size of your wine cellar, the size of the cooling unit, and the type of cooling technology used. Through-the-wall cooling units are great for those with a limited budget. If you have a small wine cellar, choose the cooling systems that can handle 300 cubic feet to 1,000 cubic feet to maintain the ideal temperature and save energy in the long run.
- Ensure the wall units are powerful enough to effectively cool your space and energy-efficient to keep your utility bills in check.
- Factor in the unit's noise level—no one wants a loud HVAC system disrupting their wine-tasting experience.
- Think about wine cellar cooling system maintenance. Regular upkeep can extend the life of your unit and prevent costly repairs down the line. This includes simple tasks like replacing the air filter, checking the refrigerant levels, and cleaning the evaporator coils. However, if you're uncomfortable performing these tasks, it's worth investing in professional maintenance services to keep your cooling system running smoothly.
Ensure that your wine collection stays in peak condition for years to come. Whether you opt for a DIY approach or enlist a professional's help, choosing a high-quality unit and maintaining it correctly is a wise investment for any wine enthusiast.
High-Quality Wine Cellar Cooling Units for Your Wine Cellar
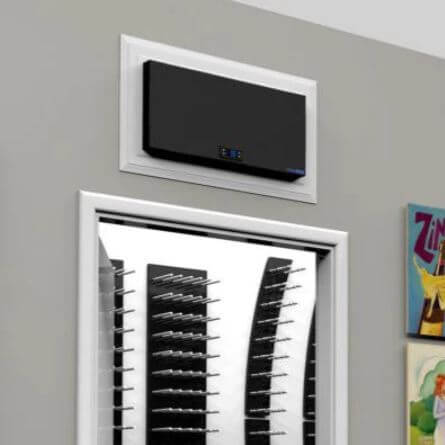
WhisperKOOL SC Pro 4000

The WhisperKOOL SC Pro 4000 is a game-changing technology representing a true evolution in wine cellar cooling. The SC PRO Series is the culmination of years of research and development. It incorporates the latest system design technologies in an all-new, sleek, compact housing design, ensuring long-term wine storage.
CellarCOOL CX4400
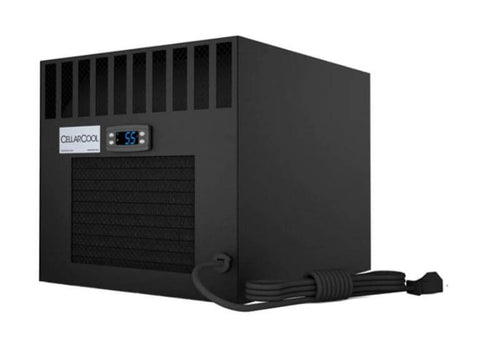
The CellarCOOL CX4400 is the perfect cooling solution for your wine cellar. It features heavy-duty coils, a state-of-the-art controller, and dynamic airflow circulation to keep your wine at the right temperature. With a 30° F low-temperature differential, it's perfect for both red and white wines. The durable and attractive housing is made in the USA and can be mounted in multiple positions. Excellent customer service is available if you have any questions or concerns.
Breezeaire WKL 4000

The WKL 4000 by Breezeaire is the best choice for protecting your wine collection. This unit has features that allow you to keep your wine at the perfect temperature, including power outage protection and blocked airflow protection. The WKL 4000 is also easy to install, making it the ideal solution for any wine enthusiast.
Cellar Pro 4200 VSi Self-Contained Unit

CellarPro 4200VSi are self-contained wine units and fully automatic. They come with a digital thermostat and humidity control and can be set to turn on and off based on your temperature and humidity settings. You can also set the unit to run continuously if desired.
4. Build or install a refrigeration system.
While a wine refrigerator, usually made with glass doors, is a practical storage solution, you can build your own refrigeration system. First, install the refrigeration system according to the manufacturer's instructions. This typically involves connecting the refrigeration lines to the compressor, evaporator, and condenser. The compressor and condensing unit are usually outside the wine cellar, while the evaporator is inside. Next, mount the evaporator inside the wine cellar, ideally on a wall near the top of the room. This will allow cool air to circulate and evenly distribute throughout the room.
5. Connect the refrigeration system to the thermostat.
Connect the refrigeration system to a thermostat to control the temperature in the wine cellar. First, attach the refrigeration lines to the evaporator and compressor. This may require cutting and soldering copper tubing. Next, mount a thermostat to control the temperature in the wine cellar. Finally, the thermostat should be connected to the refrigeration system to turn the compressor on and off to maintain the desired temperature.
6. Install a fan.

Install a fan to circulate the air inside the wine cellar and distribute cool air evenly. General steps to install a fan in your wine cellar cooling system:
Step 1: Choose a location for the fan.
The best place to install a fan in your wine cellar is typically at the top of the basement near the cooling unit, facing downward, or ideally detached from exterior walls. This will help to distribute the cool air evenly throughout the space.
Step 2: Determine the power source.
Decide whether you want to connect the fan to your existing cooling unit or use a separate power source, such as a plug or battery.
Step 3: Choose the fan.
Select a fan appropriate for your wine cellar size and cooling needs. For example, a small, low-powered fan may be sufficient for a small space, while a larger fan may be needed for a larger area.
Step 4: Mount the fan.
Securely mount the fan in the chosen location using screws, ensuring it is stable and level.
Step 5: Connect the power.
Connect the fan to its power source according to the manufacturer's instructions. If connecting to the cooling unit, ensure that the fan is connected to the appropriate wiring and that the cooling unit is set to turn on the fan when it is running.
Step 6: Test the fan.

Turn on the power and ensure the fan operates correctly, blowing cool air evenly throughout the wine cellar. Additionally, the fan should not produce excessive vibration, as this can disturb the sediment in the wine.
Installing a fan in your DIY wine cellar cooling system is a great way to regulate the environment for these reasons:
- Circulate cool air. A fan helps to circulate cool air throughout the wine cellar. This is important to ensure that all room areas are cooled evenly, which helps maintain a consistent temperature throughout the space.
- Prevent hot spots. Without a fan, areas in the wine cellar may not be cooled as effectively as others. This can lead to hot spots in the room, damaging wine by causing it to age prematurely or spoil.
- Reduce energy costs. A fan can help reduce energy costs by improving the cooling system's efficiency. When cool air is circulated effectively, the cooling unit doesn't have to work as hard to maintain a consistent temperature, which can result in lower energy bills.
- Improve air quality. A fan can also help to improve air quality in the wine cellar by promoting air exchange. This can reduce the risk of musty or moldy odors, which can impact the flavor and aroma of the wine.
7. Create a duct system.

A duct system will help distribute cool air evenly throughout the wine cellar. Creating a duct system requires some experience with basic construction and HVAC principles. Consult a professional HVAC technician or contractor to ensure your duct system is designed and installed correctly.
Step 1: Plan the duct system.
Determine the layout of the ducts, including the location and size of each vent and the path of the ducts from the cooling unit to the wine cellar. Consider factors such as the size of the wine cellar, the number of rooms, and the location of the cooling unit.
Step 2: Gather materials.
You will need ductwork, including straight ducts, elbows, connectors, duct tape, screws, and other necessary hardware.
Step 3: Cut the ducts.
Cut the ducts to the appropriate lengths using tin snips or a saw, ensuring straight and clean cuts. Use elbows and connectors as necessary to create the desired shape and direction of the ducts.
Step 4: Assemble the ducts.
Assemble the ducts by attaching the connectors and elbows using screws and duct tape. Ensure that the ducts are securely attached and that there are no gaps or leaks in the ductwork.
Step 5: Connect the ducts to the cooling unit.
Connect the ducts to the cooling unit using the appropriate connectors and hardware. Ensure that the ventholes are attached securely and that there are no gaps or leaks.
Step 6: Install the ducts in the wine cellar.
Install the ducts in the wine cellar according to your planned layout. Ensure that the vents are securely attached to the concrete walls or ceiling and not blocking any pathways or access points.
Step 7: Test the duct system.
Turn on the cooling unit and test the duct system to ensure that cool air flows evenly through the ducts and into the wine cellar.
8. Build an enclosure for the cooling unit.

Building an enclosure for your wine cellar cooling system can protect the unit and ductwork, reduce noise, and improve the overall appearance of your wine cellar. You will need materials like plywood, insulation, drywall, screws, hinges, and a door handle. You may also need tools such as a circular saw, drill, hammer, and level.
Here are the general steps to build an enclosure:
Step 1: Plan the enclosure.
Determine the location and size of the enclosure, as well as the materials you will use to build it. Consider the size and shape of the cooling unit and ductwork and the location of the enclosure within the wine cellar.
Step 2: Build the frame.
Use plywood to construct the enclosure's frame, ensuring it is the appropriate size and shape for the cooling unit and ductwork. Use screws to attach the pieces of plywood together and provide the structure level and square.
Step 3: Install drywall.
Install drywall around the outside of the frame, using screws to attach it to the plywood. Ensure that the drywall is flush with the edges of the structure and that there are no gaps or seams.
Step 4: Install the door.
Install an exterior grade door on the enclosure, using hinges and a door handle. Ensure that the door is aligned correctly and that it closes securely.
Step 5: Paint or finish the enclosure.
Paint or finish the enclosure to match the style and design of your wine cellar. Use water-based paint for interior walls.
9. Insulate your wine cellar cooling system.

Install insulation to prevent air leaks and stabilize the wine cellar's temperature. Proper insulation of your wine cellar cooling system is crucial to maintain a consistent temperature and humidity level in your wine cellar.
How to insulate your wine cellar cooling system:
Step 1: Determine the type of insulation.
Insulations are available in different types, including fiberglass, spray foam, and closed-cell foam. Determine which type is most suitable for your needs based on your budget, the size of your wine cellar, and the location of your cooling system.
Step 2: Assess the existing insulation.
Check if there is any existing insulation in your wine cellar cooling system. If there is, assess its condition and effectiveness. If the insulation is damaged or worn out, it must be replaced.
Step 3: Prepare the area.
Before installing new insulation, remove any debris, dust, or other materials from the area. Then, clean the surface to ensure it is dry and free of any obstacles.
Step 4: Measure and cut the insulation.
Measure the dimensions of the area where you will install the insulation and cut the insulation material accordingly using a utility knife or saw. Ensure the insulation fits snugly in the area and is not compressed or stretched.
Step 5: Install the insulation.
Install the insulation in the area by placing it securely against the surface. If necessary, use adhesive or fasteners to hold the insulation in place.
Step 6: Seal any gaps or cracks.
Inspect the area to ensure no gaps or cracks where air can leak through. Seal any gaps or cracks using caulk or foam sealant.
Step 7: Test the insulation.
After installing the insulation, test the effectiveness of the insulation by monitoring the temperature and humidity level in your wine cellar. If necessary, adjust the insulation to ensure that it is functioning correctly.
10. Install a vapor barrier.

Install a vapor barrier to protect the insulation from moisture damage and prevent mold or mildew growth on both the cold and warm sides of the wall.
How to install a vapor barrier:
Step 1: Choose the appropriate vapor barrier.
Different types of vapor barriers are available, such as plastic sheeting, foil-faced insulation, or specialized moisture barrier materials. Choose the type of vapor barrier best suited for your wine cellar cooling system.
Step 2: Prepare the area.
Before installing the vapor barrier, clean and dry the surface to ensure it is free of debris or moisture.
Step 3: Measure and cut the vapor barrier.
Measure the dimensions of the area where you will install the vapor barrier and cut the material accordingly. Leave enough excess material to ensure that the vapor barrier can be secured around the edges of the area.
Step 4: Install the vapor barrier.
Place the vapor barrier on the surface, ensuring it is smooth and free of wrinkles or folds. Secure the edges of the vapor barrier using tape, staples, or adhesive.
Step 5: Seal any gaps or seams.
Seal any gaps or seams in the vapor barrier using tape or adhesive to ensure no leaks or breaks.
Step 6: Test the vapor barrier.
Test the effectiveness of the vapor barrier by monitoring the humidity level in your wine cellar and making adjustments as needed.
11. Seal the room.

Seal the room to prevent air leaks and maintain a consistent temperature and humidity level.
How to seal your wine cellar:
Step 1: Inspect the room.
Inspect the room from the concrete floor to the ceiling to identify gaps, cracks, or openings allowing air to leak. Common areas to check include doors, windows, electrical outlets, and ventilation ducts.
Step 2: Seal the gaps and cracks.
Seal any gaps or cracks using caulk, weatherstripping, or foam sealant. Pay close attention to areas around doors and windows, as these are often sources of air leakage.
Step 3: Install door sweeps.
Install door sweeps at the bottom of doors to prevent air from flowing under the door. Door sweeps are available in different sizes and materials, so choose one that fits your door and provides a tight seal. Or choose a wine cellar door that doesn't give your wine cellar charming and elegant entrances but also effectively seals the room.
Step 4: Install weatherstripping.
Install weatherstripping around windows and doors to prevent air from leaking through the gaps between the frame and the glass. Weatherstripping is available in different materials, such as vinyl, foam, or rubber, so choose one with a tight seal.
Step 5: Inspect ventilation ducts.
Inspect ventilation ducts to ensure that they are adequately sealed. Use duct sealant or foil tape to close any gaps or cracks in the ducts and ensure that they are insulated to prevent heat transfer.
12. Test the system.

Test the cooling system by monitoring the temperature and humidity levels in the wine cellar over a few days to ensure it is functioning correctly.
How to test if your wine cellar cooling system is working:
Step 1: Set the desired temperature.
Set the desired temperature on your wine cellar cooling system to the temperature you want your wine to be stored. Typically, wine is stored between 50°F to 60°F (10°C to 15.5°C).
Step 2: Wait for the system to stabilize.
Wait for the wine cellar cooling system to stabilize and reach the desired temperature. Depending on the room's size and the cooling system's capacity, this may take a few hours.
Step 3: Measure the temperature.
Use a thermometer to measure the temperature inside the wine cellar. Place the thermometer at different locations throughout the wine cellar to ensure that the temperature is consistent.
Step 4: Monitor the humidity level.
Use a hygrometer to observe the humidity level inside the wine cellar. The humidity level should be maintained between 50% and 70% to prevent the corks from drying and protect the wine from oxidation.
Step 5: Check for condensation.
Check for condensation on the wine cellar's walls, ceiling, and floors. Condensation is a sign that the cooling system is not functioning correctly and may be causing excess moisture in the wine cellar.
Step 6: Test the alarm system.
If your wine cellar cooling system has an alarm system, test it to ensure it works properly.
Regular testing and maintenance of your wine cellar cooling system can ensure your wine is stored in optimal conditions.
Wine Guardian has a comprehensive video guide on building a wine storage space at home in this video:
In summary
Building DIY wine cellars can be a cost-effective and rewarding project for wine enthusiasts. Following the steps outlined, creating a reliable and efficient cooling system to maintain the ideal temperature and humidity conditions for storing wine is possible. Building a wine cellar cooling system requires careful planning and attention to detail to ensure it functions properly. However, with the right tools and knowledge, a DIY wine cellar cooling system can be a great addition to any wine lover's home.